
 Homemanager Docs
Finding & Setting Up Plugins
How to choose stable Homebridge plugins: Verified badges, Node.js compatibility checks, and step-by-step installation with Homemanager, Web UI, and CLI.
Finding and Setting Up Homebridge Plugins
Homebridge links smart devices without native Apple Home support to HomeKit, relying on plugins to communicate with hardware from brands like Shelly, Philips Hue, Roborock, and Ring.
The community provides thousands of plugins for almost any smart accessory. The following walkthrough shows how to choose maintained plugins, verify version compatibility, and complete setup using Homemanager, the web interface, or the command line.
Searching and Installing Plugins
You can install plugins through three different methods:
Setup with Homemanager
On iPhone and iPad, Homemanager combines plugin discovery with guided configuration:
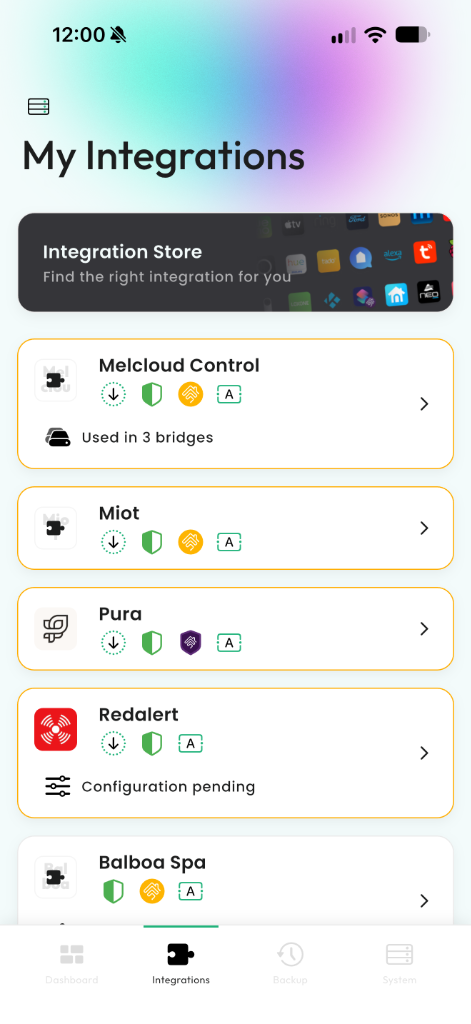
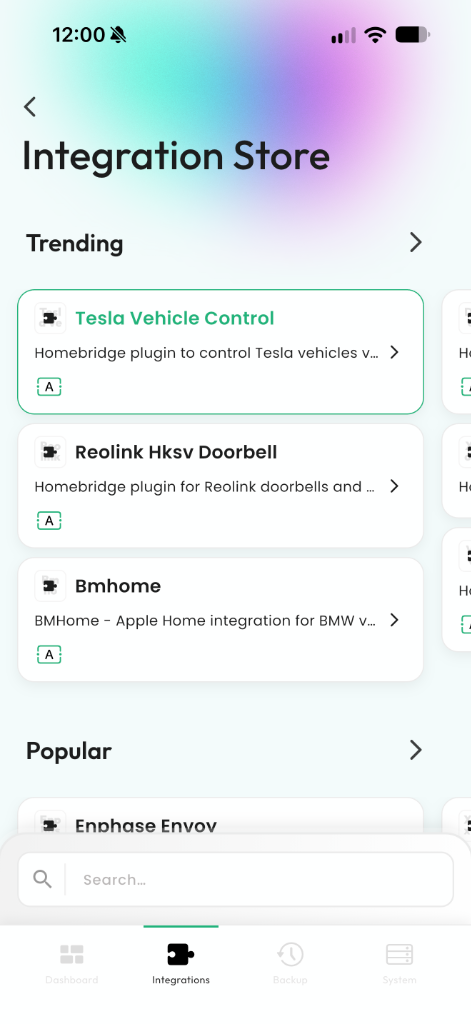
- Open the Integrations tab in Homemanager and tap the Integration Store banner at the top.
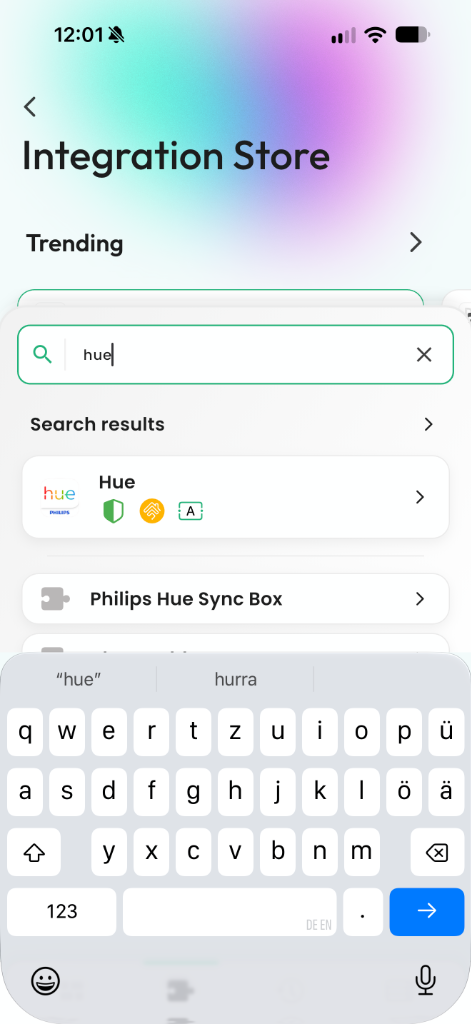
- Browse the Trending and Popular sections, or use the search bar to locate a specific model or manufacturer (such as
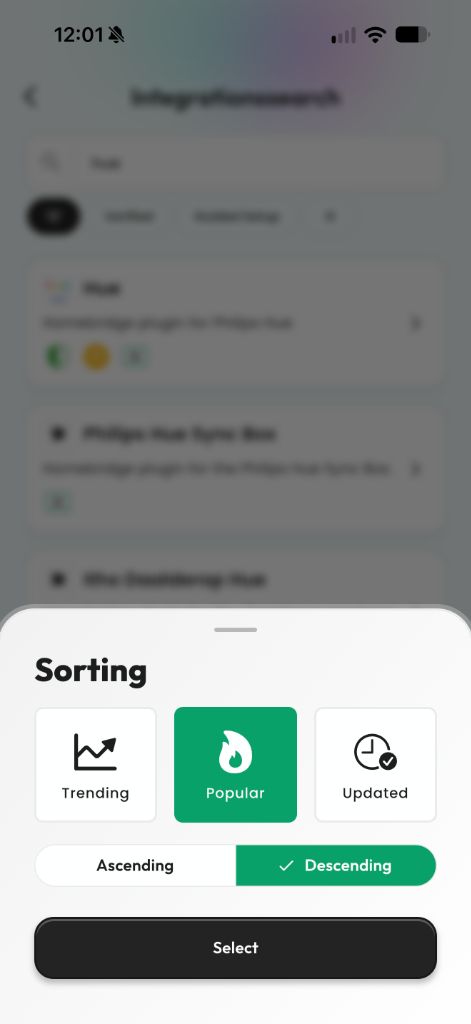
ShellyorHue). - Filter results using the top chips (All, Verified, Guided Setup) and use the sort sheet to organize by popularity, trend, or update date.
- Check the badge indicators next to each plugin:
- Green shield: Homebridge Verified Plugin (meets official quality and stability guidelines set by the Homebridge project).
- Purple shield: Maintained directly by the Homebridge core developer team.
- Orange icon: HOOBS Verified Plugin (verified for reliable operation on HOOBS).
[A]symbol: Guided Setup (includes a visual configuration form viaconfig.schema.json).
- Select your chosen plugin and tap Install.
- After the download completes, Homemanager interactively guides you through setting up a Child Bridge for the integration.
- Next, the configuration form opens so you can enter IP addresses or authentication tokens and save your settings.
A card displaying Configuration pending indicates that the plugin is installed on your server, but still requires mandatory settings before it can launch. The Used in X bridges note shows how many bridge instances or child bridges currently run this integration.
 Discover & install plugins on mobile with Homemanager
Setup via the Web Interface (Config UI X)
If you are on a desktop browser, use the built-in Homebridge web interface:
- Open the Homebridge address in your browser (default port
8581, for examplehttp://homebridge.local:8581). - Click the Plugins tab in the top navigation bar.
- Enter the device name or manufacturer into the search box.
- Click Install on the matching result.
- The browser terminal window downloads the npm package to your server.
- Once finished, the configuration window opens. Fill in your device details.
- Check the box for Enable as Child Bridge and click Save.
- Restart the bridge using the button in the dialog.
Manual Installation via the Terminal
On Linux servers, Raspberry Pi, or macOS, you can manage plugins through the command line:
# Standard npm installation:
npm install -g homebridge-hue

# Or if you use the Homebridge service manager:
hb-service add homebridge-hue
After installing the package, manually add its configuration block to /var/lib/homebridge/config.json (or your custom instance directory):
{
  "platforms": [
    {
      "platform": "Hue",
      "name": "Philips Hue",
      "users": {
        "001788FFFE123456": "YourApiKeyHere"
      }
    }
  ]
}
Validate your JSON formatting to avoid syntax errors, then restart the service:
hb-service restart
# Or through systemd:
sudo systemctl restart homebridge
Compatibility Checks Before Installation
Every plugin defines required versions for Node.js and the Homebridge core in its package.json file.
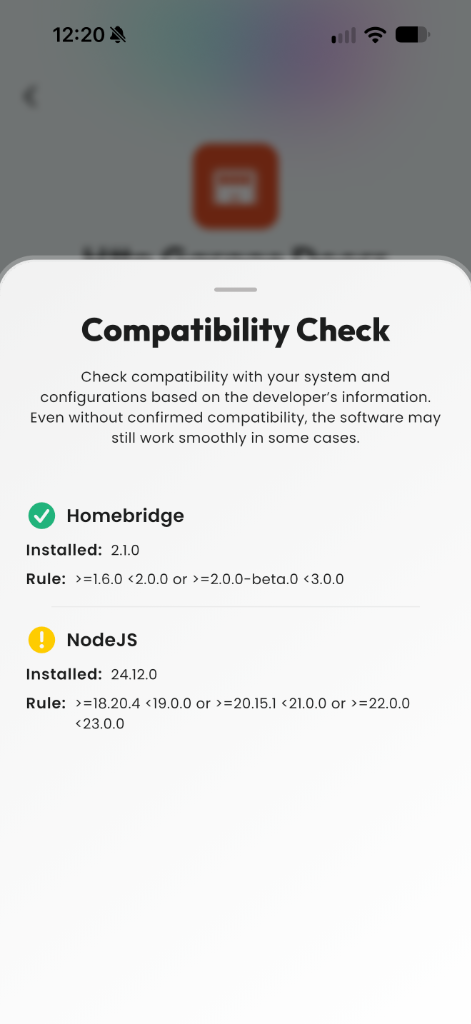
Upgrading to newer Node.js releases (like Node 22 or 24) or to Homebridge v2.x can break older plugins that depend on legacy C++ build utilities (such as node-gyp) that no longer compile.
Homemanager automatically compares a plugin's system rules against your active server before installation starts. If a version requirement does not match, the app displays a warning with the exact version rules. This catches incompatibilities early and stops broken packages from halting your server. For detailed guidance on managing runtimes, see our guide on Node.js and system updates.
Quality Criteria: How to Spot Reliable Plugins
To keep your smart home running consistently, check a plugin's maintenance status before installing. Beyond official verification, public project data on npm and GitHub helps you choose dependable extensions.
The Official Verified Badge
The Homebridge developer team tests extensions against defined technical requirements and awards the Verified badge to qualifying projects:
- Visual configuration: It includes a
config.schema.json, so settings can be changed in the user interface without modifying JSON files directly. - Child Bridge support: The extension supports process isolation.
- Node.js LTS support: The package runs on current LTS releases and avoids deprecated APIs.
- Crash protection: It catches connection timeouts and network errors so an issue with one device does not crash Homebridge.
- No telemetry: The code does not track usage or send analytics data to external servers.
Choose verified plugins whenever they are available for your hardware. They reduce setup errors and run more predictably over time.
Checklist for Community Plugins Without a Badge
When hardware requires an unverified community plugin, evaluate these indicators on GitHub and npm:
- Maintenance history: The repository received its last release or commit within the past twelve months.
- Weekly downloads: Steady download counts on npm indicate regular use across many installations.
- Repository issues: Review the Issues tab on GitHub to see whether bug reports receive responses and timely fixes from the maintainer.
- Local network protocols: Plugins that communicate directly over your home network (LAN, CoAP, or MQTT) respond faster and continue working during internet outages.
Architecture: Platform vs. Accessory Plugins
Homebridge organizes extensions into two core types. This distinction determines how you configure the plugin and how devices appear in Apple Home.
Platform Plugins
Platforms power most modern smart home integrations. A platform plugin connects to an entire bridge system (such as the Philips Hue Bridge) or a manufacturer cloud account (such as Shelly or Ring) and automatically publishes all discovered accessories to Apple Home.
When you add a new bulb or sensor in the manufacturer's app later, the platform plugin detects it automatically during runtime. In config.json, platforms reside inside the "platforms": [...] array.
Accessory Plugins
Accessory plugins control a single, dedicated device. Common examples include dummy switches for advanced Apple Home automations, HTTP relays, or wake-on-LAN triggers for desktop computers. Each accessory requires its own entry in the "accessories": [...] array of your configuration file.
Child Bridges: Why Process Isolation Should Be the Default
Regardless of which installation path you take, configure each new plugin as a Child Bridge. For detailed setup instructions, read our full Child Bridges guide.
In standard setups, plugins run within a single main process. If a network error causes one plugin to fail, the entire Homebridge server stops, taking all connected accessories offline.
Running a plugin in an isolated Child Bridge:
- Spawns a dedicated system process for that extension.
- Keeps all other accessories online if one integration fails.
- Isolates resource-heavy operations, such as camera live streams, from the core bridge.
- Allows you to restart an individual plugin in one or two seconds without interrupting the rest of your home.
Related Guides
Setting Up Child Bridges
Step-by-step instructions on isolating plugins and pairing individual QR codes in Apple Home.
Fixing Startup Errors
How to resolve boot loops, port conflicts, and crashing plugins using server logs.
Accessories Not Responding?
Common causes and fixes when accessories show 'No Response' after plugin configuration.
Windows
Set up Homebridge on Windows 10 and 11 as a background service. Step-by-step setup, firewall rules, sleep settings, and connecting via mobile app.
Child Bridges
Isolate plugins, prevent server crashes, and bypass HomeKit's 150-accessory limit. Step-by-step setup for Homemanager, the web UI, and config.json.